

Instruction
This instruction manual It is intended for users of the “Start“ Package.
First Steps
The first step is to prepare space on your drive for our files. Since our illustrations are designed for large posters and prints, they can be quite large in size. For ease of navigation during the lesson, we recommend keeping the folder structure we provide. You can modify it later as needed.

Create a folder on your computer for this work. Let’s name it ``Custom Portraits``.

Follow the provided link to access the files on Google Drive.

Downloading
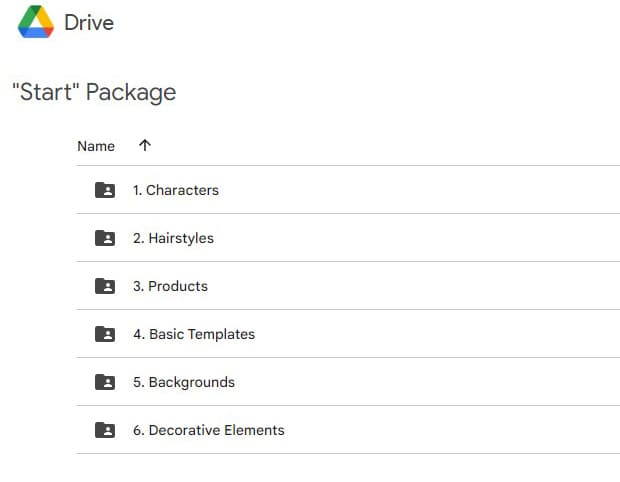
After accessing the link, you will see several folders:
- Characters
- Hairstyles
- Products
- Basic Templates
- Backgrounds
- Decorative Elements
For quick access and convenient use, we recommend downloading these files to your computer. Here are several methods to do so:
Download the entire “Start Package” folder:
This is the simplest method but may not work for everyone due to the folder’s size (over 20GB), which can cause issues during downloading. Although Google supports resuming downloads, we do not recommend this method for those with poor internet connections.

Save the “Start Package” folder to your Google Drive and sync it with your computer using the Google Drive Desktop app:
This is a good option, but remember, Google Drive offers only 15GB of free space, so this may not work if you are on a free plan.
Download Google DriveSave the folders to your Google Drive in parts:
Similar to the previous method, but you save and download folders sequentially to stay within your free plan limits.
So, you add one or more folders to your Google Drive, sync them with your computer, download them, and then delete them from your Google Drive to free up space and add new folders.
It’s not the most convenient method, but some might find it useful.
Download the folders in parts:
This method suits most users. Download the folders one by one and then reassemble them on your computer.
Start with the most important files, then download the rest. The essential folders are:
- Characters
- Hairstyles
Since you’ll be creating custom portraits, it’s important to have quick access to hairstyles, clothes, etc. It’s recommended to keep these folders on your computer, maintaining the same structure as on Google Drive.
Navigation
To help you navigate, here’s a breakdown of what each folder contains and how to use them:
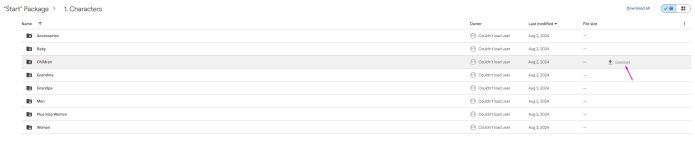
Characters
Folder with characters and their clothes. Each character (Man, Woman, Plus-Size Woman, Grandma, Grandpa, Child, and Baby) has its own folder containing relevant files. For example, in the “Woman” folder:
Bodies: Contains various body poses, each labeled (e.g., SC1_Pose_7). SC1 indicates Skin Color 1, and Pose_7 indicates pose number 7.
If you want to assemble a character in pose #7, you need to find the clothing suitable for that specific pose. Open the Pose 7 folder to find clothes for that pose. Inside, you’ll see folders (Blouse, Tank-Tops, T-Shirts) containing PNG illustrations for your character.
This structure prevents confusion about which clothes fit which character and pose. Items in folders labeled by pose number are specific to those poses, while others like jeans and shoes are universal and fit all poses.
Some other folders include:
- High Heels (fit all poses)
- Jeans (fit all poses)
- Long Skirts (fit all poses)
- Pose 7 (items for pose 7 only)
- Pose 8 (items for pose 8 only)
- Pose 9 (items for pose 9 only)
- Pose 12 (items for pose 12 only)
- Shorts (fit all poses)
- Skirts (fit all poses)
- Sneakers (fit all poses)
This structure ensures you can quickly find the right items for each character, saving time and avoiding confusion.
Hairstyles
Folder with Hairstyles
Important! Since the same hairstyle can be used for different characters, we did not separate them for each character. Hairstyles are organized by collections for easy navigation. You will see folders numbered according to their collection release.
Let’s take a look inside. In the Hairstyles folder, you will see folders numbered 1, 2, 3, 4, 5, etc. Inside each folder, there are subfolders labeled Style 1, Style 2, Style 3, and so on. Within these subfolders, you will find hairstyles in different colors.
If you look at the hairstyle previews we provided, you will see that each hairstyle has a number. This is the number your clients will use to indicate the hairstyle they want.
For example, let’s take this women’s hairstyle (picture). Your client will specify the number 24-2 and color 28. What does this mean and how do you find it?
- 24 indicates the folder number containing the hairstyle.
- 2 indicates the style.
So, you need to go to folder 24, Style 2, and select hairstyle number 28.
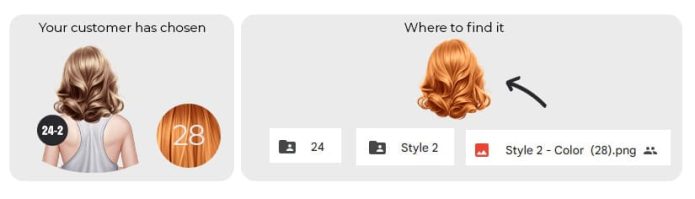
It’s that simple. No need to search further; just look at the number and navigate to the correct folder.
Products
Folder for Your Future Products
The structure we created for this folder is very convenient, and we use a similar organization ourselves. Inside this folder, you will find two more folders: “mockups” and “Products,” along with product previews.
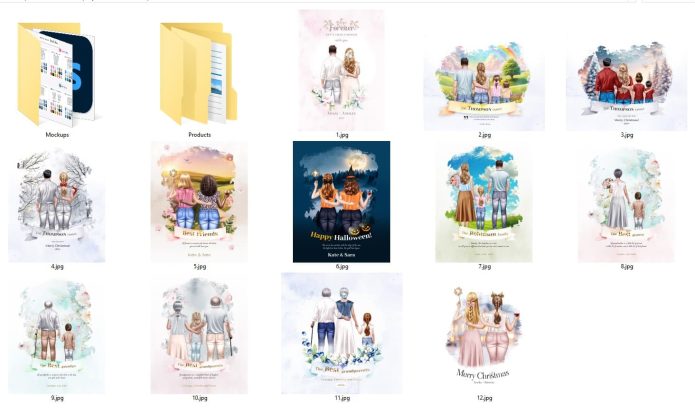
Why this way? Having created numerous products over many years, we know how difficult it can be to find the right one. Naming folders by product names is not ideal because the name might change, causing confusion. By viewing all your products as previews in the Products folder, you can visually find what you need. When you find the right product, note its name (or number) and go to the corresponding folder.
This is particularly useful if you have over 300+ products. You don’t need to remember the folder names; just glance at the previews.
The next four folders are additional materials. You can change the structure, names, delete, or add new files as you see fit. This will not affect the convenience of your work.
Basic Templates
Folder with Basic PSD Templates
This folder contains base PSD templates with assembled characters, both individually and in combination with each other. This section is intended to simplify the creation of future products. You don’t need to assemble characters from scratch; just drag the needed combination into your document and replace the clothing.
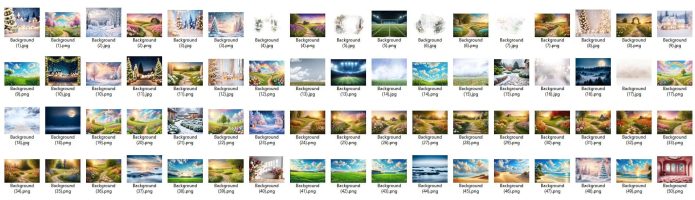
Backgrounds
Folder with Backgrounds for Your Products
This folder contains various background options in different sizes.


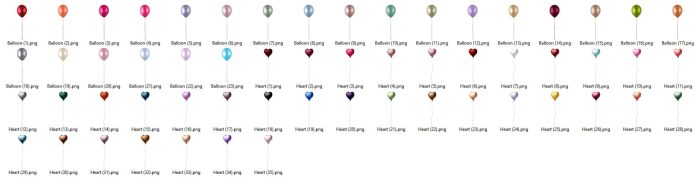
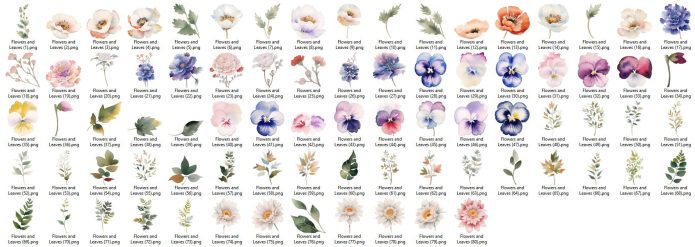
Decorative Elements
Folder with Additional Cliparts
This folder contains additional cliparts needed for decorating your works.


First Products
Now that we have downloaded the files and identified their locations, let’s dive into creating your first personalized portraits for your clients.
Although our set is intended for both digital and physical products, we will not cover physical product creation in this instruction. The basic information applies to both, but digital products require more detailed setup. If you plan to create physical products, simply skip the sections related to digital file preparation.
To make things easier for you, we have created several product examples and fully designed client previews for product #2. Let’s take a look at it.
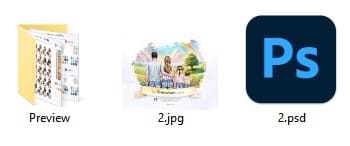
Open the folder: Products – Products – 2
Inside, you will find a Preview folder, a product image, and a PSD template. Open the PSD file to see its structure. We assume you have basic Adobe Photoshop skills and know how to work with layers, smart objects, and other basic tools, so we won’t describe every detail to avoid turning this instruction into a full Photoshop course. However, we will highlight important points to help you find the necessary functions.
When you open the PSD template, you will see multiple layers.
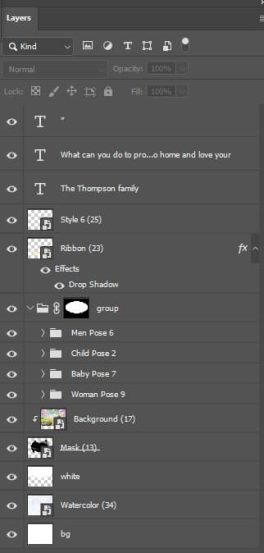
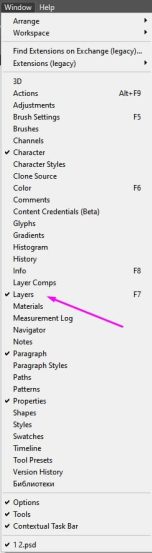
To view them, ensure the Layers panel is active. If it is not visible, go to Window – Layers.
In this example, we will work with a family of four. All members are grouped under “Group”. Within this group, there are four sub-groups for each character: Men Pose 6, Child Pose 2, Baby Pose 7, Woman Pose 9.
The pose numbers in the group names are intentional. They make it easier to find the correct clothing for each pose.
Customizing the Characters
Suppose you have published this product and received your first order. The client provided the following details:
Men
- Hair: 31-10, Color: 36
- Skin Color: 2
- T-Shirt: 60
- Jeans: 46
Woman
- Hair: 28-3, Color: 17
- Skin Color: 2
- Blouse: 7
- Jeans: 80
Child
- Hair: 24-13, Color: 36
- Skin Color: 2
- Blouse: 7
- Jeans: 80
Baby
- Hair: 18-4, Color: 36
- Skin Color: 2
- T-Shirt: 60
- Jeans: 46
Family Name: The Coleman Family
We need to change the hairstyles, skin color, and clothing of the characters. Let’s start with the man and his hairstyle.
Using the Quick Selection tool, which you can find in the top corner of your Photoshop, select the hairstyle by clicking on it with the left mouse button.
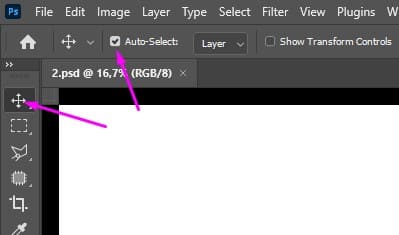
The layer with the desired hairstyle will be highlighted in the Layers panel, so you won’t need to search for it.
Right-click on the hairstyle layer and select “Replace Contents.”
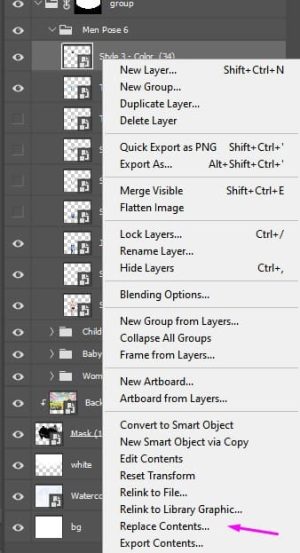
A window will appear where you need to find the file you want to replace the hairstyle with. Go to the folder with your package and enter the “Hairstyles” folder. Our hairstyle is named 31-10 and the color is 36. So, we go to folder 31, then to folder Style 10, and double-click on the hairstyle numbered 36.
Great, your hairstyle is replaced. If it has slightly shifted from the correct position due to size differences with the previous hairstyle, just move it slightly using the Move tool.
We do the same with the other hairstyles.
Now let’s change the skin color. In our example, the client provided us with number 2. So we again select the body layer as we did with the hairstyle using the Quick Selection tool, right-click on the layer in the Layers panel, and choose “Replace Contents.” Go to the folder Characters – Men – Bodies. In the Layers panel in the template, you can see that the character group is named Men Pose 6. Therefore, we select the file SC2_Pose_6. As you remember, SC2 is the skin color number and Pose_6 is the pose number used in the template. The client chose color number 2, so this is the file we need.
Okay, let’s do the same with the other characters.
Next, we need to change the clothing. The client provided the following data for the man:
- T-Shirt – 60
- Jeans – 46
As we remember, the pose used in the template for the man is pose number 6, so we go to Characters – Men – Pose 6 – T-Shirts and select the T-shirt numbered 60.
Now let’s change the jeans. They are universal and fit all poses in this set, so we go to Characters – Men – Jeans and select the jeans numbered 46.
We do the same for the other characters.
Finally, we need to change the text. Select the Text tool (T), click on the text, and change the inscription.

Save the file in the desired format: it can be JPG or PDF depending on the formats you offer your clients, and the order is ready to be sent.
Setting up a poster with 4 people took me only 3 minutes. Once you get used to where and how the files are located, you’ll be able to do it much faster.
This is exactly why I recommend using smart objects. You won’t have to assemble the illustration from scratch every time. Just select the necessary files and replace the template files with them.
Fonts
Since we are not the authors of the fonts used in some of our templates, we do not have the right to distribute them ourselves, but you can download them for free from the official website.
Google FontsSome of the fonts that are used in the templates are:
Previews
Alright.
Let’s also talk about previews. We have created previews for you with hairstyles, skin colors, and hair colors for each character. Of course, if you plan to add more characters, you may need to combine several previews into one, and you can do this yourself since you have everything you need.
Observing sellers of personalized digital portraits, we noticed how much they offer clients to choose for customizing the portrait. It’s a huge list of many options, which can be confusing, especially when offering different clothing options in various colors and prints.
Why is this bad?
First, due to the complexity of customizing the final product.
Second, it can be quite difficult for the client to imagine how all these colors will combine. In real life, colors are not as saturated, have many reflections, highlights, texture, their own shadows, cast shadows, and change based on lighting and surroundings. Digital illustrations need to be universal and fit into any background to some extent, but because of this, colors can contrast strongly and look strange, especially if combining low-contrast pastel items with high-contrast dark ones. This may not look very good, and your client might be disappointed with the result or ask you to change the colors, adding extra work and time loss for both you and your client.
What do we propose?
We advise you to limit the available choice of colors and the number of characters. Offer more different variants of the same product as separate items. Don’t try to fit all possible options into one product. Then, if asked, “Do you have the same thing but with three children?” you can simply provide a link to another product. Usually, the client sees a preview and wants something similar. If the client has any additional requests, you can always make changes for an extra fee. However, if you frequently receive specific requests, like adding a dog to the portrait, then simply add such an option to your product, description, and preview.
This way, you will save both your time and your clients’ time.
I also suggest abandoning the choice of clothing in favor of ready-made color options. In personalized portraits, the most important things are the unique features of a specific person, mainly hairstyle and skin color. You can always combine this. For example, make some products where only hairstyle and skin color are available for selection, some more customizable products, and a few with full customization at a higher price.
In the set, we have added 100 colors for each clothing item for each character. This way, all characters have the same clothing colors. This might seem quite dull, but you can always diversify the monotony with additional sets. This set is intended to be a basic package, allowing you to create universal posters with many characters without spending time designing available color options, just one palette for all items that you can show your clients to choose colors for each character.
This way, it won’t be hard to create families of 5-10 or more people. You won’t get lost in the files and won’t spend hours searching for the right colors. Everything is simple, clear, and sorted.
This concludes our discussion. We’ve covered all the main points related to the “Start” package. Additional materials in the form of short tips and tutorials are available both on the website and in the instructions folder.
Thank you for joining us and creating together with us.
We wish you successful sales!