
Template Customization Guide
We’ve designed the editor to be as intuitive as possible, but some features may still need a bit of explanation.
Here you’ll find a simple step-by-step guide on how to customize your template.
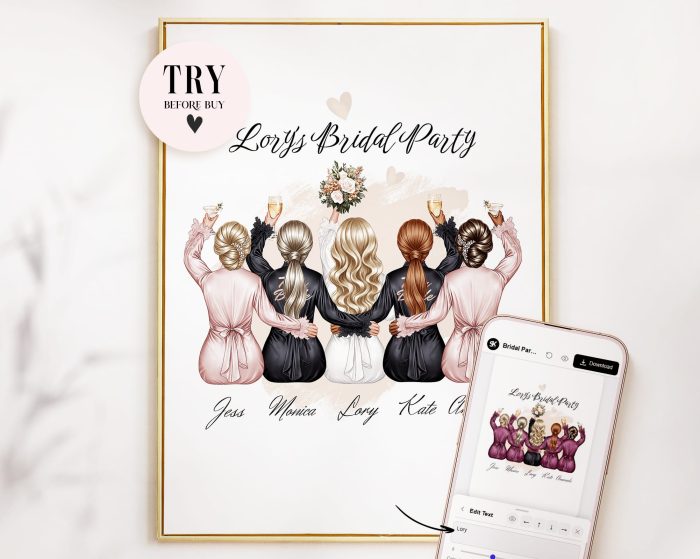
We’ll walk you through it using the Bridal Party Template as an example.
Getting Started
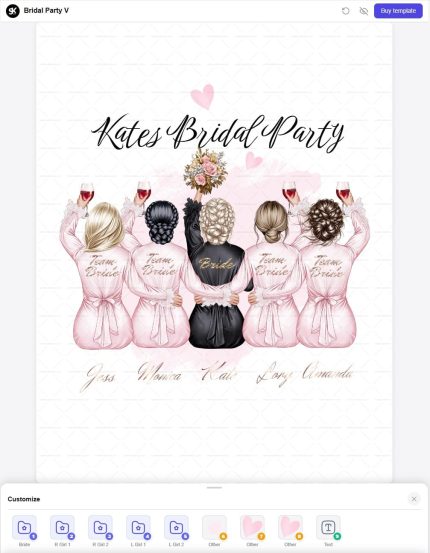
The first thing you’ll see when opening any template is the Customize button.
Click it to access all editable elements.
Understanding Layers & Folders
The purple folders represent grouped elements — usually parts of a character.
For example:
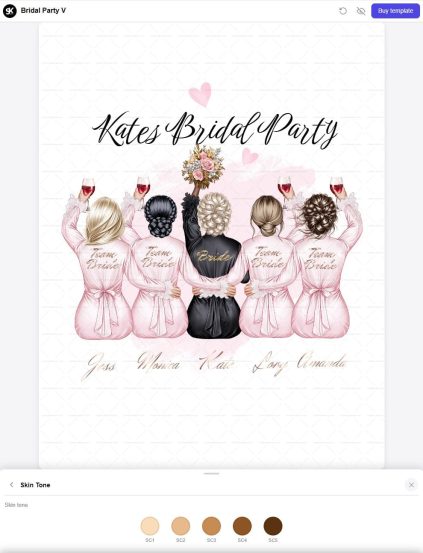
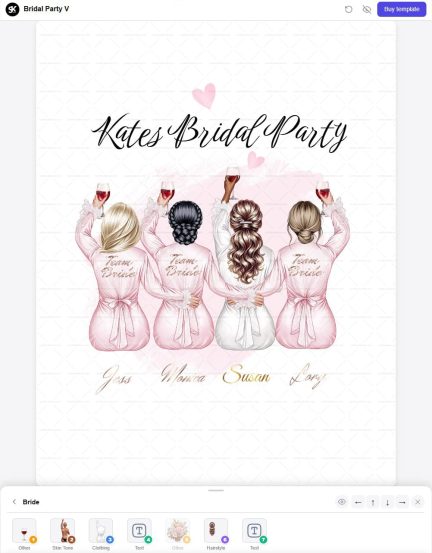
Click on the Bride folder to see all layers related to the bride.
- Select Skin Tone to change the skin color
- Use the back arrow next to the folder name to return
Clothing & Appearance
Open Clothing to choose outfit colors
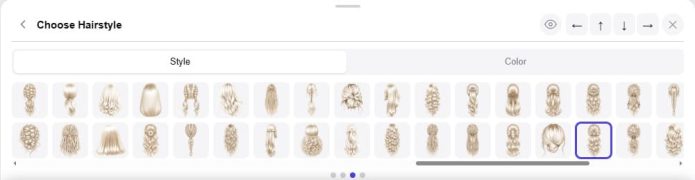
Open Hairstyles to access two tabs:
- Style — hairstyle shape
- Color — hair color
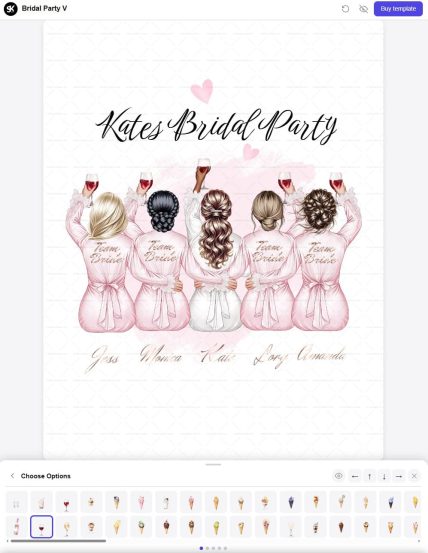
Accessories & Visibility
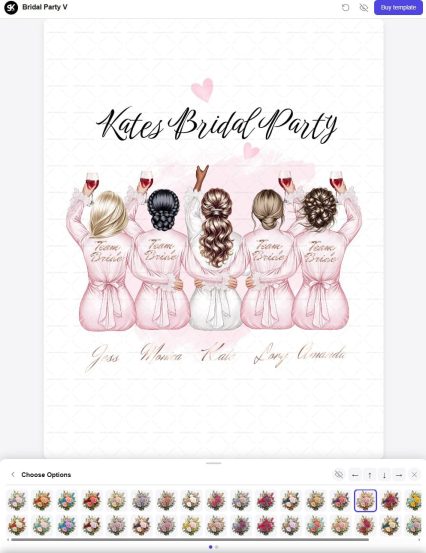
- Open Other (flower icon) to choose a bouquet
- To remove an item, toggle the eye icon at the top of the panel
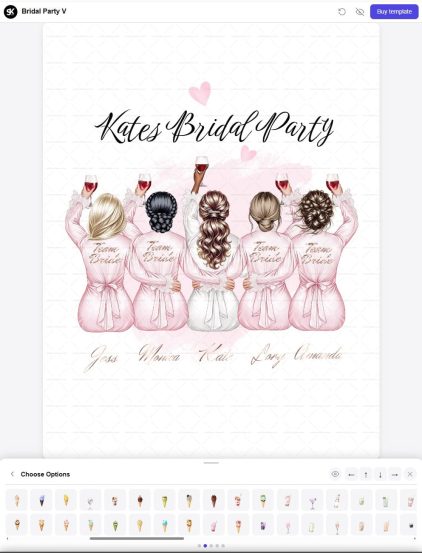
Some elements may be hidden by default and appear semi-transparent.
For example, a drink layer may be hidden because the bride is holding a bouquet.
To switch:
- Turn off the bouquet
- Turn on the drink layer using the eye icon
Moving Objects
Some elements can be repositioned using arrow controls at the top of the panel.
Example:
If you want to move a glass slightly lower, simply press the down arrow a few times.
(Note: Not all elements are movable — only those that require fine adjustments.)
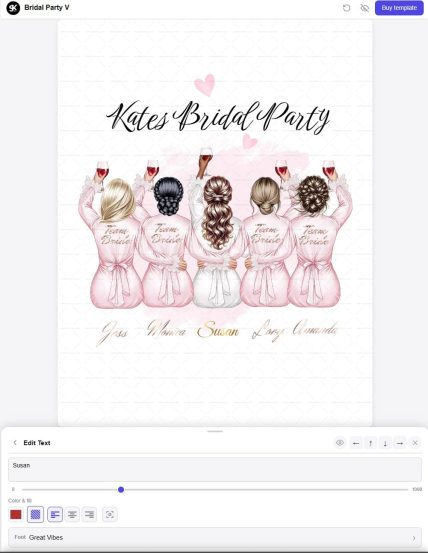
Editing Text
In this template, the bride has two text elements:
- “Bride” on the robe
- A name below (e.g., Kate)
To edit:
- Click on the text layer
- Enter your own text
You can also:
- Change text color
- Apply shiny/pattern effects
- Adjust font and size
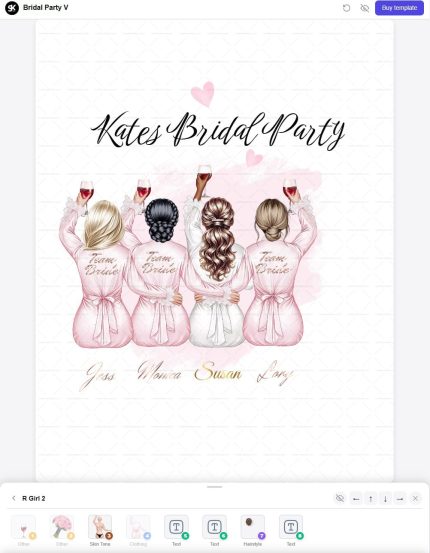
Customizing Multiple Characters
The same editing options apply to all characters in the template.
This design includes:
- 1 bride
- 4 bridesmaids
But you can easily adjust the number of people.
To remove a character:
- Open their folder (e.g., RGirl 2)
- Toggle the eye icon
If the layout looks off-center after removing someone:
- Open each character folder
- Use the arrow controls to reposition them
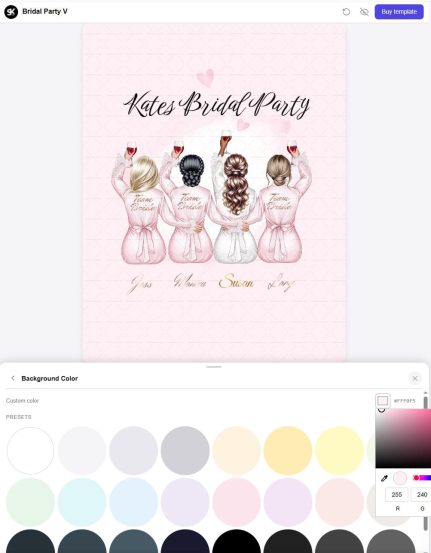
Background & Decorations
Some templates include additional elements like:
- Backgrounds
- Decorative details
You can:
- Change them
- Hide them
- Move them
To change the background color:
- Return to the main template screen
- Look for the color circle in the top-left corner
- Click it to select your own background color
Final Step — Download
Once you’re happy with your design, you can purchase the template and receive a download link for the high-resolution version.
All your changes will be saved if you open the download link in the same browser where you customized the template.
So you’ll only need to download your final result — no need to redo anything.